Category: SharePoint
Move list items with attachments between SharePoint farms: Access to the Rescue!
Update 8/27/2017: I updated the title of this post to avoid confusion about which versions of SharePoint and Access can be used. I also added a screenshot to this post showing where to find the option to import data from a SharePoint list using Access 2016 (it’s buried a little deeper in the UI than it was in Access 2013). I also verified that all the other steps in this article remain the same for Access 2016. One user posted an issue in the comments with the exported list displaying a “something went wrong” error in either classic or modern view, but I was unable to reproduce this with the list I was using to test. There are some documented issues (see section towards bottom of article) that will force a list to render using the classic experience, usually due to the data types of one or more fields in the list.
Original post appears below.
I was recently faced with the unenviable task of moving the full contents of a custom SharePoint list with about 60 columns (including attachments totaling about 400 MB) between a hosted instance of SharePoint 2007 and SharePoint Online. While there is no shortage of options for getting data from a list in one environment into another, I was constrained by the fact that this was a cloud-hosted instance of SharePoint 2007 where I had no server or administrator-level access. I went through a mental checklist of my options:
- Save the list as a template with contents – Nope. Way too big with those 400 MB worth of attachments.
- Export the list to Excel – Nope. Only includes the fields defined in the list view and does not include attachments.
- Create an empty version of the list in the destination environment, then use datasheet/quick view to copy data between the two lists – Nope. Again, the attachment problem (not to mention how tedious it would be to create identical views that would support datasheet/quick view in both environments).
- Write code to programmatically handle the export from SharePoint 2007 – Eh. With no server-level access in the cloud-hosted SharePoint 2007 environment, writing full trust code with the server object model was off the table. Theoretically I could have written code that leveraged SharePoint 2007’s .asmx web services, but I only wanted to go there as a last resort.
Then, as if by providence, I accidentally clicked to open Access 2013 when I actually meant to open Excel. I knew SharePoint 2013 had the hooks to import and export data using Access, but could I somehow use Access to pull the data out of SharePoint 2007? I clicked to create a new Blank Desktop Database and started my journey:
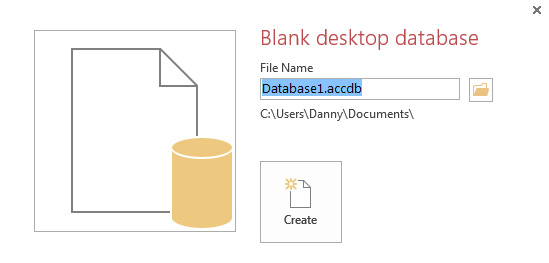
I gave the database a name and pressed Create:
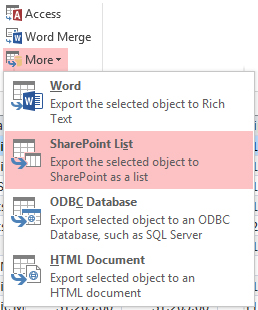
Time to start poking around. I went to the External Data tab, and clicked More to reveal SharePoint List in the “Import & Link” section of the ribbon:
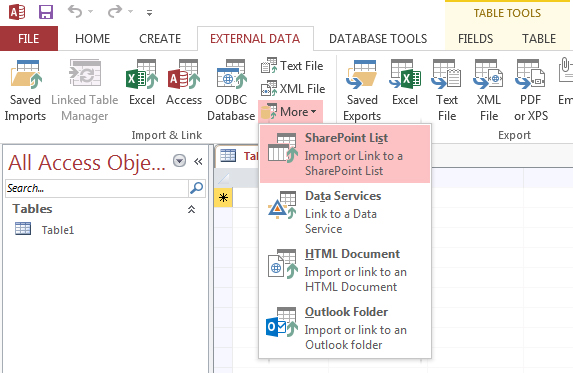
Importing a SharePoint list using Access 2013.
In Access 2016, select New Data Source from the Import section of the ribbon, then choose From Online Services and then SharePoint List:
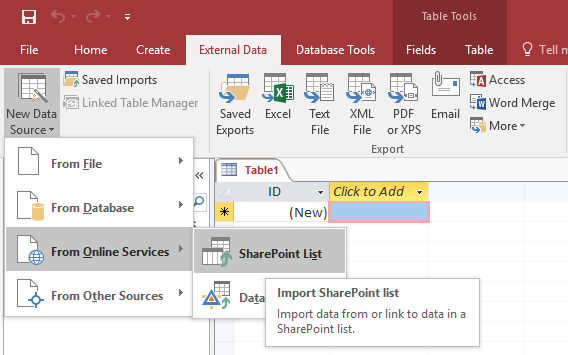
Importing a SharePoint list using Access 2016.
I entered the URL to my SharePoint 2007 site and chose to Import the source data into a new table in the current database.
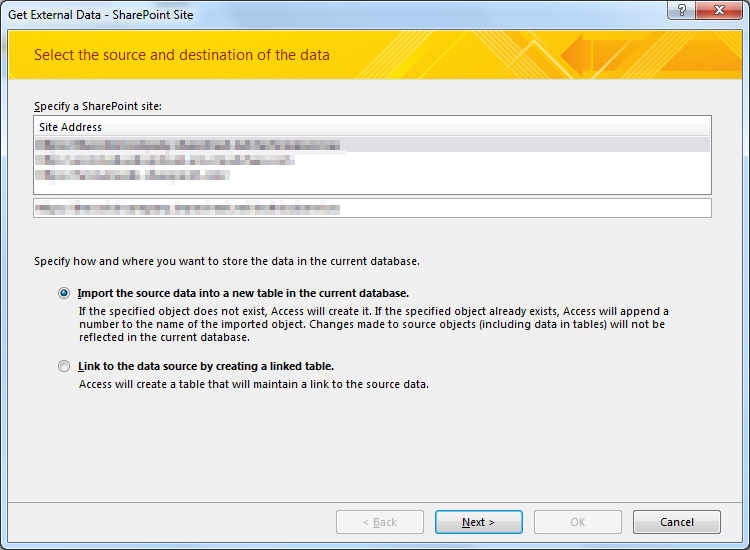
I selected the list I wanted to export and clicked OK.
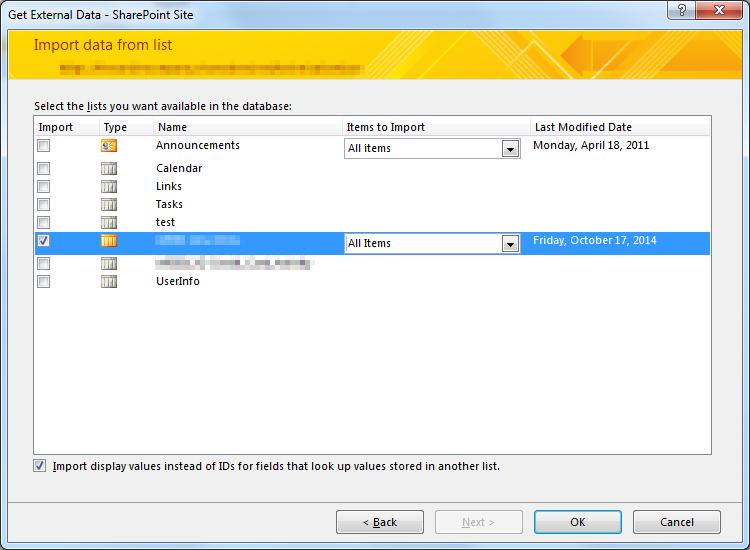
Access then proceeded to lock up my computer for several minutes as it imported the data, but it was worth the wait. Keep in mind that although logically we are exporting the data from SharePoint 2007, from Access’ perspective we are importing this data into Access. From here, we will export this data to a list in our SharePoint Online site.
![]()
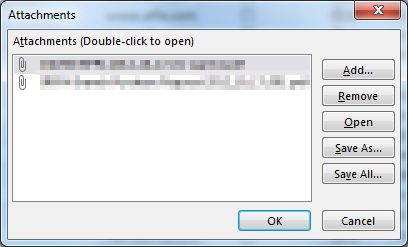
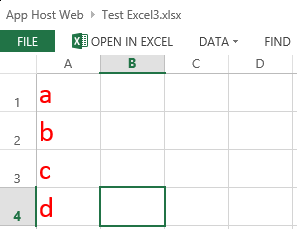
When the import completed, I clicked Close and noticed in the “All Access Objects” view in the left pane, my database now contained a table named after the SharePoint list I just brought over. I double-clicked it and sure enough, all the data was there including the list item attachments!
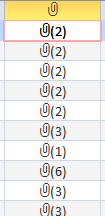
Stunned by my good fortune, I double-clicked some of these cells to confirm the attachments were actually there. They were!
Time to get this data into SharePoint 2013. I went back to the External Data tab, and clicked More to reveal SharePoint List in the “Export” section of the ribbon:
Much like the import wizard earlier, the export wizard allows me to connect to a SharePoint site (I chose my SharePoint Online site this time) and specify a name for the new list.
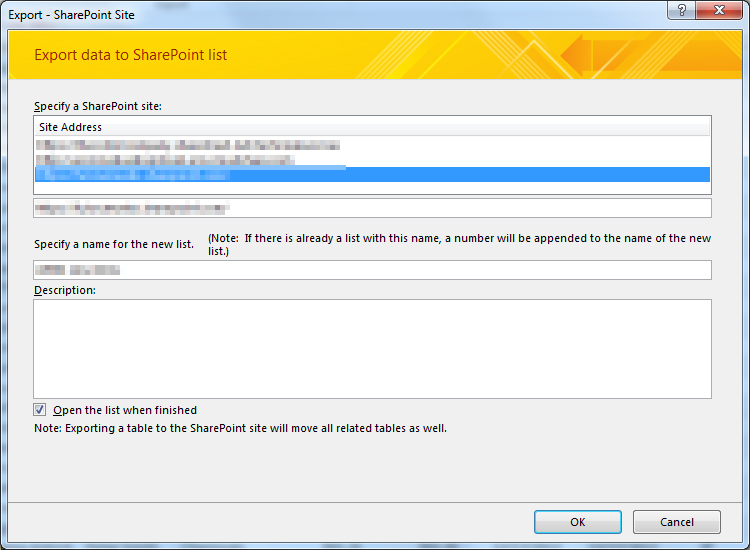
I pressed OK and allowed Access to do its thing (it took about 15 minutes). When it was done, my browser opened to the newly imported list in SharePoint Online. Not only was the list schema perfect (if you’ve ever imported a spreadsheet to create a new list, you know how frustrating it can be to have all of your Choice columns converted to Single line of text), but all the attachments to the list items were there as well!
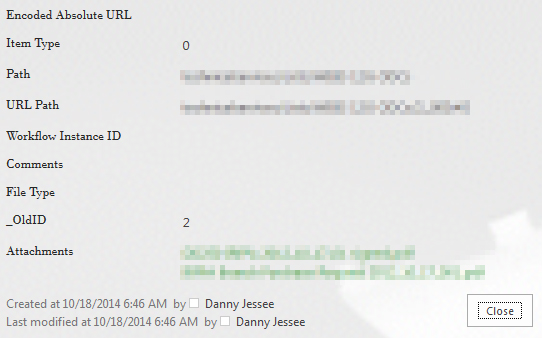
You will notice a few extra columns are created as part of the process:
- Encoded Absolute URL
- Item Type
- Path
- URL Path
- Workflow Instance ID
- Comments
- File Type
- _OldID
You can safely remove these from your new list if you do not want or need them.
Mission accomplished! Thanks, Access 2013!
Accessing SharePoint Data from Provider-Hosted Apps: Use the Right Context
I have spent the better part of the last two years working with the new app development model for SharePoint 2013. Recently I have focused on building apps that access, manipulate, and interact with data stored in SharePoint Online with Office 365. If you have done any development using the client-side object model (CSOM) for SharePoint, you understand the importance of instantiating the proper ClientContext object to access data in a particular SharePoint site. The ClientContext constructor takes as an argument the URL of a SharePoint site and allows you to access data stored in the Lists collection of the Web associated with it. In this post, I will discuss the various context objects you should use in your provider-hosted app depending on where the data your app needs to access resides and if the user’s permissions need to be considered. If you have been developing apps for SharePoint for awhile now (and even if you haven’t), I strongly encourage you to use Visual Studio 2013 and the Office Developer Tools for Visual Studio 2013 – March 2014 Update.
Host webs and app webs
When dealing with apps for SharePoint, you will become familiar with host webs and app webs:
- Host web – the SharePoint site to which an app is installed
- App web – the special isolated site (a unique app web is provisioned for each installation of the app) where the app for SharePoint’s internal components and content, such as lists, content types, workflows, and pages, are deployed
Note that a provider-hosted app is not required to have an app web, and in fact may not need one depending on your business requirements.
Your app will always have Full Control permissions to its app web. However, your app will need to request (and be granted) permissions by the user installing your app in order to access data in the host web. This is handled through the app manifest.
If your app needs to access data in the SharePoint site where it is being installed, you will be working with a host web context of some sort. As you will see, there are actually two different host web context objects, depending on the app authorization policy you choose.
Life made easy, thanks to SharePointContext.cs
When you create a new provider-hosted app in Visual Studio 2013, you have the option to create a new ASP.NET Web Forms or MVC application to serve as your app’s remote web application. If you are using the Office Developer Tools for Visual Studio 2013 – March 2014 Update, you also have the option to convert an existing ASP.NET web application to an app for SharePoint project (really cool!) In either case, you will notice that SharePointContext.cs is added to the remote web application project. This file contains class definitions for SharePointAcsContext and SharePointHighTrustContext, which allow you to create host web and app web context objects based on whether your trust broker is ACS (which it is with Office 365) or if you are on premises. I won’t delve into too much more detail in this post, but Kirk Evans has an outstanding writeup about these classes.
Accessing data in the app web
To access data in the SharePoint app web from your app, use the following pattern:
CSOM (C#)
var spContext = SharePointContextProvider.Current.GetSharePointContext(Context);

using (var clientContext = spContext.CreateUserClientContextForSPAppWeb())
{
    Web web = clientContext.Web;
    clientContext.Load(web);
    clientContext.ExecuteQuery();

    ListCollection lists = web.Lists;
    clientContext.Load(lists);
    clientContext.ExecuteQuery();
}
REST (C#)
var spContext = SharePointContextProvider.Current.GetSharePointContext(Context);
HttpWebRequest listRequest = (HttpWebRequest)HttpWebRequest.Create(spContext.SPAppWebUrl + "/_api/web/lists");
listRequest.Method = "GET";
listRequest.Accept = "application/atom+xml";
listRequest.ContentType = "application/atom+xml;type=entry";
listRequest.Headers.Add("Authorization", "Bearer " + spContext.UserAccessTokenForSPAppWeb);
JSOM
var appweburl = decodeURIComponent(getQueryStringParameter("SPAppWebUrl"));
var clientContext = new SP.ClientContext(appweburl);
var appWeb = clientContext.get_web();
var appWebListColl = appWeb.get_lists();
clientContext.load(appWebListColl);
clientContext.executeQueryAsync(onAppWebGetListSuccess, onError);
Accessing data in the host web
To access data in the SharePoint host web (the SharePoint site where your app is installed) from your app, use the following pattern:
CSOM (C#)
var spContext = SharePointContextProvider.Current.GetSharePointContext(Context);

using (var clientContext = spContext.CreateUserClientContextForSPHost())
{
    Web web = clientContext.Web;
    clientContext.Load(web);
    clientContext.ExecuteQuery();

    ListCollection lists = web.Lists;
    clientContext.Load(lists);
    clientContext.ExecuteQuery();
}
REST (C#)
var spContext = SharePointContextProvider.Current.GetSharePointContext(Context);
HttpWebRequest listRequest = (HttpWebRequest)HttpWebRequest.Create(spContext.SPAppWebUrl + "/_api/web/lists");
listRequest.Method = "GET";
listRequest.Accept = "application/atom+xml";
listRequest.ContentType = "application/atom+xml;type=entry";
listRequest.Headers.Add("Authorization", "Bearer " + spContext.UserAccessTokenForSPHost);
JSOM
var appweburl = decodeURIComponent(getQueryStringParameter("SPAppWebUrl"));
var hostweburl = decodeURIComponent(getQueryStringParameter("SPHostUrl"));
var clientContext = new SP.ClientContext(appweburl);
var factory = new SP.ProxyWebRequestExecutorFactory(appweburl);
clientContext.set_webRequestExecutorFactory(factory);
var appContextSite = new SP.AppContextSite(clientContext, hostweburl);
var hostWeb = appContextSite.get_web();
hostWebListColl = hostWeb.get_lists();
clientContext.load(hostWebListColl);
clientContext.executeQueryAsync(onHostWebGetListSuccess, onJSOMError);
Note that using JSOM, we still need to construct a ClientContext for the app web before we generate an AppContextSite for the host web, made possible through the SP.ProxyWebRequestExecutorFactory.
A note about the app-only authorization policy
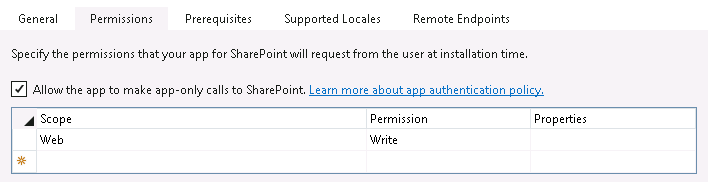
By default, authorization checks in the host web succeed only if both the current user and the app have sufficient permissions to perform the action in question, such as reading from or writing to a list. We are reminded that the user’s permissions are taken into account based on the names of the context and access token objects we use in these scenarios: for instance, CreateUserClientContextForSPHost and UserAccessTokenForSPHost. However, your app has the ability to do something akin to running with elevated privileges using the app-only policy for authorization. Also controlled through the app manifest, the app-only policy is useful when an app doesn’t need or want to consider the permissions of the current user. In Visual Studio 2013, you can specify that your app would like to have the ability to use the app-only policy by checking this box in the AppManifest.xml editor, on the Permissions tab:
That being said, just because your app is granted this permission does not mean that you can use the same host web context or access token as before to automatically leverage it. To access data from the SharePoint host web (taking only your app’s permissions into account and ignoring the current user’s permissions) from your app, use the following pattern:
CSOM (C#)
var spContext = SharePointContextProvider.Current.GetSharePointContext(Context);

using (var clientContext = spContext.CreateAppOnlyClientContextForSPHost())
{
    Web web = clientContext.Web;
    clientContext.Load(web);
    clientContext.ExecuteQuery();

    ListCollection lists = web.Lists;
    clientContext.Load(lists);
    clientContext.ExecuteQuery();
}
REST (C#)
var spContext = SharePointContextProvider.Current.GetSharePointContext(Context);
HttpWebRequest listRequest = (HttpWebRequest)HttpWebRequest.Create(spContext.SPAppWebUrl + "/_api/web/lists");
listRequest.Method = "GET";
listRequest.Accept = "application/atom+xml";
listRequest.ContentType = "application/atom+xml;type=entry";
listRequest.Headers.Add("Authorization", "Bearer " + spContext.AppOnlyAccessTokenForSPHost);
Remember that in order to use the app-only policy, your app must request and be granted this permission by the site owner who installs your app. Also note that there is no JSOM example using the app-only policy because apps that do not make OAuth authenticated calls (such as apps that are only JavaScript running in the app web) cannot use the app-only policy.
As you can see, the code you write in each of the above scenarios (accessing data in the app web, host web, or using the app-only authorization policy) is identical except for the method or property you use from the SharePointContext class to get the appropriate context or access token. Understanding these subtle differences is vitally important when making sure your app has the ability to access and manipulate the SharePoint data it needs.
Enabling custom ribbon buttons dynamically based on multiple selected item values using RefreshCommandUI and JSOM
Updated 9/6/2019: Thanks to Julien for noticing that the CountDictionary() function no longer exists in SharePoint 2016 and beyond. Since SP.ListOperation.Selection.getSelectedItems(context) already returns the collection of selected items, I replaced the call to CountDictionary() with selectedItems.length instead.
Updated 12/23/2014: Thanks to Chris Bell for pointing out some errors in the JavaScript in this post. The script and sample code below have been updated to reflect these corrections.
In this post, I will show you how to use the built-in RefreshCommandUI() method to update the enabled status of a custom ribbon button based on field values in multiple selected list items. In my searching, I have only found examples that changed the enabled status of a custom ribbon button based on a single selected item (I even blogged a very simple example of this here).
For an exhaustive treatment of how to add a custom button to the server ribbon, check out Walkthrough: Adding a Button to the Server Ribbon on MSDN. Our focus in this post is on the CommandUIHandler element of the XML necessary to declare this button, which contains an EnabledScript attribute that contains JavaScript that must return true or false–true if the button should be enabled, false to disable it.
In this example, we set our EnabledScript to “javascript:EnableFinishedButton();” which enables us to declare this function in an external JavaScript file (that we can load via a ScriptLink Custom Action). As an added bonus, this makes our script MUCH easier to locate and debug using our browser’s built-in JavaScript debugging tools! In this example, our EnableFinishedButton function will return true to enable our “Mark As Finished” ribbon button ONLY when ALL selected items in the list (one or more) have a value of “In Progress” in the “Status” field. This example should be easy to adapt to suit your needs.
For completeness, here is the XML necessary to declare the button and associated CommandUIHandler, as well as load the external JavaScript file containing the custom functions we need. While custom ribbon buttons can be deployed in SharePoint-hosted apps, I have packaged this as a farm solution so that I may specify JavaScript functions defined in an external file (loaded via a ScriptLink custom action) for the CommandAction and EnabledScript attributes. As an aside, I strongly encourage you to read Sean McDonough’s post on Custom Ribbon Button Image Limitations with SharePoint 2013 Apps to learn about some interesting (and frustrating!) limitations that forced me to go the farm solution route.
Here are the contents of CustomAction.js, which I am provisioning to the LAYOUTS folder:
function EnableFinishedButton() {
    var context = SP.ClientContext.get_current();
    var list;
    var selectedItems = SP.ListOperation.Selection.getSelectedItems(context);
    var totalSelectedItems = selectedItems.length;

    if (totalSelectedItems > 0) {
        var web = context.get_web();
        context.load(web);
        var listId = SP.ListOperation.Selection.getSelectedList();
        list = web.get_lists().getById(listId);

        // We will use this variable to determine whether EnableFinishedButton() is being called directly or by RefreshCommandUI()
        var hadToMakeCall = false;

        if (typeof this.itemRows == "undefined" || this.itemRows.length != totalSelectedItems) {
            // This will be true if this is the first time an item has been selected in the list OR if the selected items have changed, forcing the need to check again
            hadToMakeCall = true;
            GetItemsStatus();
        }

        // If we just issued the async call, do not enable the button yet
        if (hadToMakeCall) {
            return false;
        }
        else {
            // Once the call has returned, set the enabled status based on the returned value
            return this._can_be_enabled;
        }
    }
    else {
        this.itemRows = undefined;
        return false;
    }

    function GetItemsStatus() {
        // Store the selected list items in an array where their values can be checked
        itemRows = [];

        for (i in selectedItems) {
            itemRows[i] = list.getItemById(selectedItems[i].id);
            context.load(itemRows[i]);
        }

        context.executeQueryAsync(Function.createDelegate(this, onGetItemsSuccess), Function.createDelegate(this, onGetItemsQueryFailed));
    }

    function onGetItemsSuccess() {
        this._can_be_enabled = true;

        // Iterate through all selected items. If one is false, the value of _can_be_enabled will be false and the button will not be enabled
        for (i in itemRows) {
            this._can_be_enabled = this._can_be_enabled && itemRows[i].get_item("Status") == "In Progress";
        }

        // Now we can call the EnabledScript function again
        RefreshCommandUI();
    }

    function onGetItemsQueryFailed(sender, args) {
        alert(args.get_message());
    }
}

function MarkItemsFinished() {
    var context = SP.ClientContext.get_current();
    var web = context.get_web();
    var selectedItems = SP.ListOperation.Selection.getSelectedItems(context);
    var listId = SP.ListOperation.Selection.getSelectedList();
    var list = web.get_lists().getById(listId);
    var i;
    for (i in selectedItems) {
        // Update the "Status" field of each selected item to have a value of "Finished"
        var listItem = list.getItemById(selectedItems[i].id);
        listItem.set_item("Status", "Finished");
        listItem.update();
    }
    context.executeQueryAsync(Function.createDelegate(this, onUpdateItemsSuccess), Function.createDelegate(this, onUpdateItemsFailed));

    function onUpdateItemsSuccess() {
        alert("Items updated!");
    }

    function onUpdateItemsFailed() {
        alert(args.get_message());
    }
}
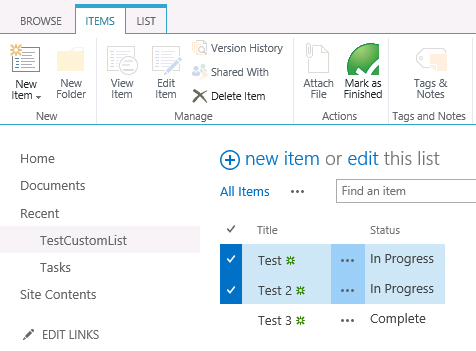
Once deployed, we navigate to our custom list. As long as the items we select have a value of “In Progress” in the “Status” field, the custom button remains enabled:
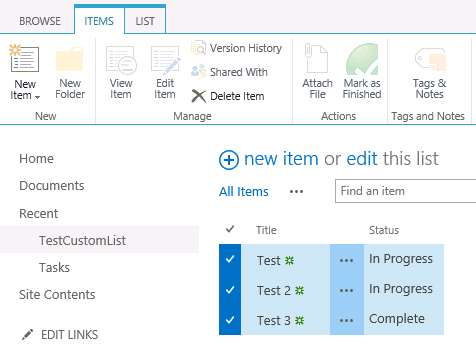
As soon as we select an item that does not have a value of “In Progress” in the “Status” field, the button is no longer enabled:
Download the sample code for this project:
SPS Events DC (Chevy Chase) Recap
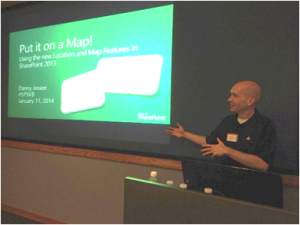
A huge thank you to everyone who came out to SPS Events DC at the Microsoft office in Chevy Chase, MD today! I was honored to represent Fulcrum at my fourth SPS Event so far in 2014 and speak to a crowd of developers and IT professionals about cloud-hosted apps for SharePoint 2013.
With the recent news from the Office 365 Team about the Autohosted Apps Preview Program (spoiler alert: it ends June 30th), I have refined this talk to focus almost exclusively on Provider-hosted apps for SharePoint 2013. If your organization has made any investments in Autohosted apps (and each of the last two times I have given this talk, at least one person in the audience has), there is a step-by-step guide for transitioning your Autohosted apps to Provider-hosted apps here.
There was tremendous audience participation during my session today, which I always appreciate. We had lots of good discussions about “the art of the possible” with Provider-hosted apps, including when to use CSOM, JSOM, and/or REST in our apps. We also discussed OAuth and the cross-domain library, which allow us to securely access and manipulate data stored in SharePoint from external web applications, whether they live on-premises or in the cloud.
I love speaking at SPS Events DC, which happen each year in Reston and Chevy Chase. The team of organizers and volunteers who put this event together are second to none, and it’s always fun to catch up with so many of my friends and colleagues in the DC SharePoint community.
My slide deck from today’s session is below. The code I used in my sample Provider-hosted app may be downloaded here. Feel free to reach out to me in the comments or on Twitter if you have any questions!

SharePoint Event brings Fulcrum to Boston
Photo courtesy @SPBrennan
As you read in my previous post, Fulcrum frequently travels across Virginia and the DC metro area to speak about the capabilities of the SharePoint platform to software developers, IT professionals, and end users at SharePoint user groups and one-day conferences known as SPS (SharePoint Saturday) Events. These events are held in cities around the world and are completely free to the public. The speakers and attendees at these events volunteer their time and sacrifice a Saturday to help others learn more about SharePoint and all the possibilities it offers. On April 12th, I headed north to Beantown to present at the SPS Boston Event at the Microsoft office in Cambridge, Massachusetts.
Fulcrum develops and maintains many custom solutions built on the SharePoint platform for our Army INSCOM and Department of Education customers, among others. Many of these solutions are built using a paradigm known as “farm solutions,” where custom code utilizes resources on the same servers that run SharePoint. This can potentially have an adverse impact on the performance of the SharePoint environment. To address this, SharePoint 2013 introduces a brand new app development model that allows custom code to be deployed anywhere, including the cloud or even a Java application server! I presented a session entitled “Build Secure Cloud-Hosted Apps for SharePoint 2013.” In this session, I demonstrated different ways that apps hosted in the cloud can securely work with data stored in SharePoint and discussed how the new app model has the potential to revolutionize SharePoint development, making SharePoint farms run more reliably and efficiently while helping our customers to realize significant cost savings.
If you are interested in learning more about SharePoint 2013 and the new app development model, I encourage you to reach out to me—or any other member of the SharePoint community—anytime. Members of the SharePoint community pride themselves on being accessible and are eager to share their knowledge, guidance, and advice with other SharePoint users around the world. To find the next SPS Event near you, visit http://spsevents.org.
Fulcrum Presents at Regional SharePoint Events
Many of our government customers leverage different versions of SharePoint to collaborate, automate business processes, and share data. Fulcrum has developed numerous custom solutions built on the SharePoint platform. In addition to being a robust and feature-rich platform, SharePoint is widely known for its enthusiastic community of developers, administrators, and end users who freely volunteer their time and energy to share their knowledge at one-day conferences known as SPS (SharePoint Saturday) Events, as well as local and regional SharePoint user groups around the world. These events are completely free to the public, who also volunteer their time to learn more about SharePoint and all the possibilities it offers. I have had the privilege of representing the talented SharePoint professionals at Fulcrum, presenting at several such events over the past few months.
 Last November 7th, I presented an introductory session on the new app development model for SharePoint 2013 at the Federal SharePoint User Group and Women in SharePoint DC. This paradigm shift for custom development promises greater reliability and up-time in on-premises SharePoint environments like the ones our customers rely on for critical mission operations. On January 11th, I had the privilege of presenting at SPS Events – Virginia Beach. This was the third year I have spoken at this event. My session was entitled Put it on a Map! Using the new Location and Map Features in SharePoint 2013. As the name implies, I spoke about the many enhancements the latest version of SharePoint offers with respect to “geolocation metadata”—essentially plotting data associated with a particular location on a map. This gives us the potential to bring engaging mapping solutions to our clients and their customers more readily and reliably than ever before. These capabilities are of particular interest to our defense and military customers, where enabling our Armed Forces to quickly and efficiently find information based on a geographic location can save lives. I also presented the Put it on a Map! session at the Reston SharePoint User Group on March 10th.
I will be representing Fulcrum at SPS Events – Boston on April 12th and at several other SPS Events and user groups in the months ahead, presenting more advanced sessions about building secure cloud-hosted apps for SharePoint 2013.
 If you are currently using SharePoint, or are just interested in learning more about it, I encourage you to reach out to me—or any other member of the SharePoint community—anytime. Members of the SharePoint community pride themselves on being accessible and are eager to share their knowledge, guidance, and advice with other SharePoint users around the world. If you are interested in learning more about Fulcrum’s capabilities, I encourage you to visit our website at http://www.fulcrumco.com.
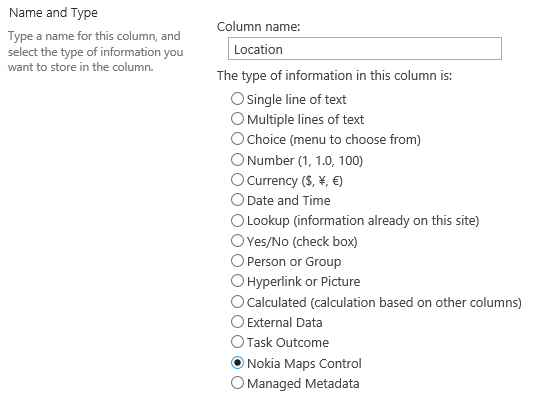
Create a custom SharePoint 2013 Geolocation field using Nokia HERE maps
NOTE: The HERE Maps API for JavaScript 2.x used in the post below will be phased out by September 30, 2015. For more information about the 3.x version, please visit https://developer.here.com/javascript-apis.
Much has been written about the new Geolocation capabilities of SharePoint 2013. If you haven’t already, I would highly recommend reading this overview on MSDN. In short, SharePoint 2013 offers a new field type called Geolocation, which represents point location data (latitude and longitude) that can be automatically plotted on a Bing map.
But what if you want to leverage a different mapping provider, such as Nokia HERE? Fortunately, SharePoint offers the ability to define custom field types based on an existing field type (in this case, SPGeolocationField). Using SharePoint 2013’s new client-side rendering framework, it is possible to define custom rendering logic for your custom field type using JavaScript.
Microsoft provides sample code that allows you to create a Geolocation field that renders using Nokia maps. The custom field type uses JavaScript to render a text box with a search button that performs a geocoding request on the inputted text string using the Nokia Places API. Once a coordinate location has been returned, a HERE map is rendered with a placemark centered on the inputted location. Unfortunately, the sample code has not been updated since February 2013 and a few changes need to be made in order to make use of Nokia’s new HERE mapping platform. If you would like to make use of this sample code, hopefully this post will help you!
Step 1 – Register a HERE developer account
In order to use HERE maps in your application, you need to first sign up for an account on the HERE developer portal. Once you have registered, go to Create app. Specify the following:
Application platform: Web
Solution: Web Experiences
License type: Platform Evaluation Key
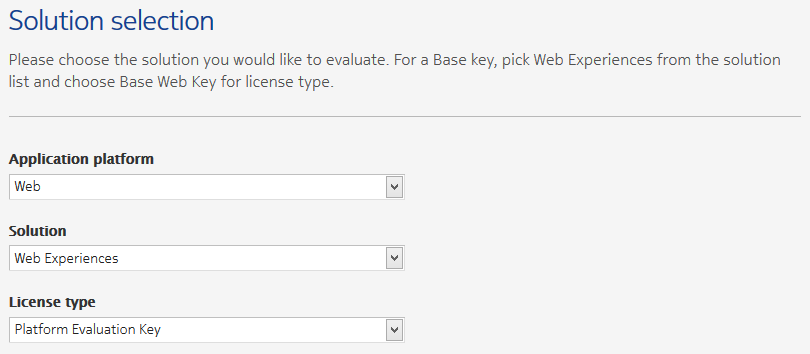
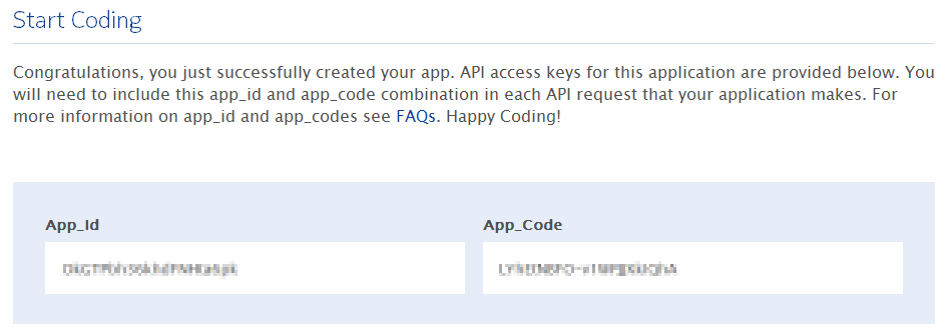
Press Proceed to application details. Specify details about your application, including the Application website URL (the domain name where SharePoint is running). After you provide your contact information and accept the license agreement, you will see a confirmation screen with your App_Id and App_Code values:
Step 2 – Update the sample project
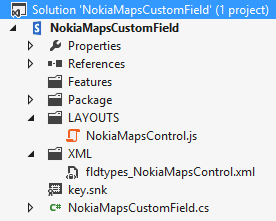
When I first opened the sample project, I was prompted to upgrade it to a SharePoint 2013 solution. After upgrading the project, I had to manually add NokiaMapsControl.js and fldtypes_NokiaMapsControl.xml back to the project (NOTE: These files should be placed directly under the mapped {SharePointRoot}\TEMPLATE\LAYOUTS and {SharePointRoot}\TEMPLATE\XML directories and NOT in subfolders.) The project should now look like this:
Step 3 – Update NokiaMapsControl.js
Make the following changes/updates to NokiaMapsControl.js:
1. In line 1, update the g_appId variable with the App_Id value from your application from the HERE developer portal.
2. In line 2, update the g_authToken variable with the App_Code value from your application from the HERE developer portal.
3. Replace line 138 with the following two lines, which load the new HERE Places API and JavaScript API:
downloadJS('http://js.api.here.com/se/2.5.3/jsPlacesAPI.js');
downloadJS('http://js.api.here.com/se/2.5.3/jsl.js');
4. Update lines 240-241 with the following (the HERE API parameter names have changed from appId and authenticationToken to app_id and app_code, respectively):
nokia.Settings.set("app_id", g_appId);
nokia.Settings.set("app_code", g_authToken);
Step 4 – Build and deploy the project, then add the new field to a list
After deploying the project, add a new column based on the custom field type to a list:
Step 5 – Add a new item to the list
The Nokia Maps Control field renders as a text box with a search button. Enter a location in the text box and press the Search button:

The HERE geocoder service will return a coordinate location for the inputted string, plotted on a HERE map:
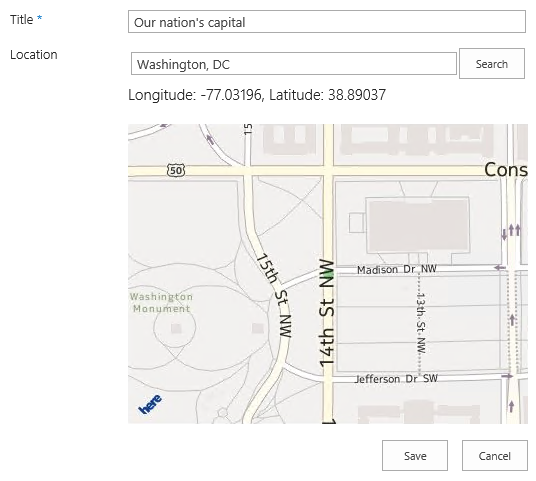
Congratulations! You are now ready to use your custom geolocation field with Nokia HERE maps.
You can download a version of the project with all the necessary changes here. Just update lines 1 and 2 of NokiaMapsControl.js with your App_Id and App_Code values and you’ll be good to go!
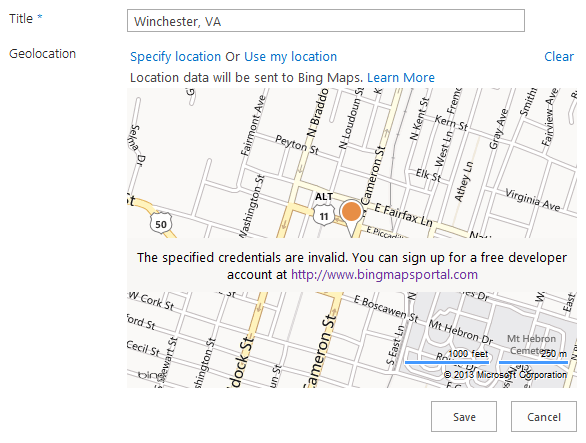
Set the Bing maps API key in Office 365 using CSOM to leverage SharePoint 2013 Geolocation features
Much has been written about the new Geolocation capabilities of SharePoint 2013. If you haven’t already, I would highly recommend reading this overview on MSDN. In short, SharePoint 2013 offers a new field type called Geolocation, which represents point location data (latitude and longitude) that can be automatically plotted on a Bing map.
In order to take full advantage of the built-in Bing mapping functionality, you must obtain an API key from the Bing Maps portal. Different API key types are available depending on your needs (Trial keys work great for demos and development environments, while Basic or Enterprise keys may better suit your needs in a production environment).
If you attempt to leverage a Geolocation column in SharePoint 2013 (on-premises or in Office 365) without obtaining and setting a Bing Maps API key, you will receive a subtle reminder that you need to do so:
In an on-premises environment, you can use the PowerShell Set-SPBingMapsKey cmdlet to set the Bing maps API key at the farm level. However, it is not possible to use this cmdlet in an Office 365 environment. Fortunately, the Bing maps API key is also stored in the property bag of an SPWeb (with key “BING_MAPS_KEY“). We can set this value via .NET or JavaScript using the client object model.
To set the API key I obtained for my Office 365 site, I used the following code in a simple .NET console application:
        static void Main(string[] args)
        {
            var webUrl = new Uri("");
            using (ClientContext ctx = new ClientContext(webUrl))
            {
                var login = "";
                var password = "";
                var secureStrPwd = new SecureString();
                foreach (char c in password)
                {
                    secureStrPwd.AppendChar(c);
                }

                var creds = new SharePointOnlineCredentials(login, secureStrPwd);
                ctx.Credentials = creds;

                var web = ctx.Web;
                web.AllProperties["BING_MAPS_KEY"] = "";
                web.Update();

                ctx.ExecuteQuery();
            }
        }
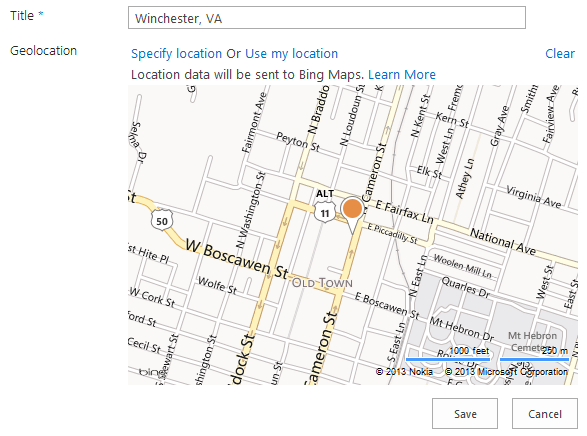
Once the API key has been set, your maps will render without that annoying message!
Using JSOM to write (small) files to a SharePoint 2013 document library
Update 8/24/2017: The code for this app is available for download here.
Update 3/3/2013: Problem solved! The culprit: “Protected View” in Office 2013. Thanks to this blog post from Tobias Lekman, after disabling protected view in each of the Office 2013 applications (I had to update these settings separately in Word, Excel, and PowerPoint), every document I uploaded using the code below opened without any errors on my CloudShare VM.
Update 2/16/2013: The issue I had opening files uploaded into SharePoint described below may not be an issue after all. As it turns out, the CloudShare VM where I was doing my development and testing is generating the same error for ANY document I upload, even “the old fashioned way.” I accessed the same document library from a remote client and the same products that generated errors when being uploaded using the code above opened just fine, without any issues or errors. I will update this post as I learn more about the root cause of this problem.
A recent post on Yammer lamented the lack of examples in the SharePoint 2013 API documentation that use the JavaScript Object Model (JSOM) to do anything more than create a very basic text file in a SharePoint document library.
After lots of digging and a fair amount of trial and error, I now understand why that is the case.
The use case seems simple enough: allow the user to select a file from his or her local machine using an HTML DOM FileUpload object on a form, then use JSOM to upload this file into a document library. It’s certainly easy enough to do using the Client Script Object Model (CSOM). As it turns out, there are a couple of very good reasons why your document upload capability (whether you package it into an app for SharePoint or something else) should NOT leverage JSOM:
- Per MSDN, you can only work with files up to 1.5 MB when using JSOM. It is recommended that you use REST to deal with larger files. (Incidentally, there is a comment in the article on using the REST endpoints that reads “See How to: Complete basic operations using JavaScript library code in SharePoint 2013 for a code example that shows you how to upload a binary file that is smaller than 1.5 MB by using the SharePoint 2013 Javascript object model.” Unfortunately, the only code example in that article creates a very rudimentary plain text file.)
- Unless your browser supports the File APIs introduced in HTML5 (specifically the FileReader API), you are out of luck. As a general rule, browsers will block attempts by JavaScript to access and read files from the local file system for security reasons. If you are using IE, only version 10 supports the FileReader API.
Although I was somewhat discouraged by this news, I was determined to develop an app for SharePoint 2013 that presented a simple file upload control to the user and stored the file in a document library (as long as it was smaller than 1.5 MB, of course). I figured as long as I could save Office documents to the library (i.e., more than a simple plain text file), I would have succeeded.
To accomplish this, I knew I would need to make use of the HTML5 FileReader API. (Because of that, I also knew I would need to test this solution using IE 10, Firefox, or Chrome!) Based on the MSDN documentation, I knew I would be setting the contents of the file by using a new SP.Base64EncodedByteArray. The FileReader API exposes three methods for reading the contents of a file:
- readAsText() – this method reads the plain text contents of a file, but does not properly handle binary files.
- readAsArrayBuffer() – this seemed to be the most promising option, but no matter how I tried to cast the contents of the ArrayBuffer to a Base64-encoded byte array, I was not able to successfully reproduce a file from the file system in a document library. If anyone out there has any suggestions that might enable readAsArrayBuffer() to work, please let me know in the comments!
- readAsDataURL() – this method returns the contents of the file using the Data URI scheme. Thanks to a handy utility method I found here, I can convert this Base64-encoded string into a JavaScript Uint8Array and use that to populate the SP.Base64EncodedByteArray that the JSOM expects.
Here is the JavaScript I ended up using:
$(document).ready(function ()
{
    // Get the URI decoded host web URL
    // We will use this to get a context here to write data
    hostweburl = decodeURIComponent(getQueryStringParameter("SPHostUrl"));
});

function CreateFile()
{
    // Ensure the HTML5 FileReader API is supported
    if (window.FileReader)
    {
        input = document.getElementById("fileinput");
        if (input)
        {
            file = input.files[0];
            fr = new FileReader();
            fr.onload = receivedBinary;
            fr.readAsDataURL(file);
        }
    }
    else
    {
        alert("The HTML5 FileSystem APIs are not fully supported in this browser.");
    }
}

// Callback function for onload event of FileReader
function receivedBinary()
{
    // Get the ClientContext for the app web
    clientContext = new SP.ClientContext.get_current();
    // Use the host web URL to get a parent context - this allows us to get data from the parent
    parentCtx = new SP.AppContextSite(clientContext, hostweburl);
    parentWeb = parentCtx.get_web();
    parentList = parentWeb.get_lists().getByTitle("Documents");

    fileCreateInfo = new SP.FileCreationInformation();
    fileCreateInfo.set_url(file.name);
    fileCreateInfo.set_overwrite(true);
    fileCreateInfo.set_content(new SP.Base64EncodedByteArray());

    // Read the binary contents of the base 64 data URL into a Uint8Array
    // Append the contents of this array to the SP.FileCreationInformation
    var arr = convertDataURIToBinary(this.result);
    for (var i = 0; i < arr.length; ++i)
    {
        fileCreateInfo.get_content().append(arr[i]);
    }

    // Upload the file to the root folder of the document library
    this.newFile = parentList.get_rootFolder().get_files().add(fileCreateInfo);

    clientContext.load(this.newFile);
    clientContext.executeQueryAsync(onSuccess, onFailure);
}

function onSuccess()
{
    // File successfully uploaded
    alert("Success!");
}

function onFailure()
{
    // Error occurred
    alert("Request failed: " + arguments[1].get_message());
}

// Utility function to remove base64 URL prefix and store base64-encoded string in a Uint8Array
// Courtesy: https://gist.github.com/borismus/1032746
function convertDataURIToBinary(dataURI)
{
    var BASE64_MARKER = ';base64,';
    var base64Index = dataURI.indexOf(BASE64_MARKER) + BASE64_MARKER.length;
    var base64 = dataURI.substring(base64Index);
    var raw = window.atob(base64);
    var rawLength = raw.length;
    var array = new Uint8Array(new ArrayBuffer(rawLength));

    for (i = 0; i < rawLength; i++)
    {
        array[i] = raw.charCodeAt(i);
    }
    return array;
}
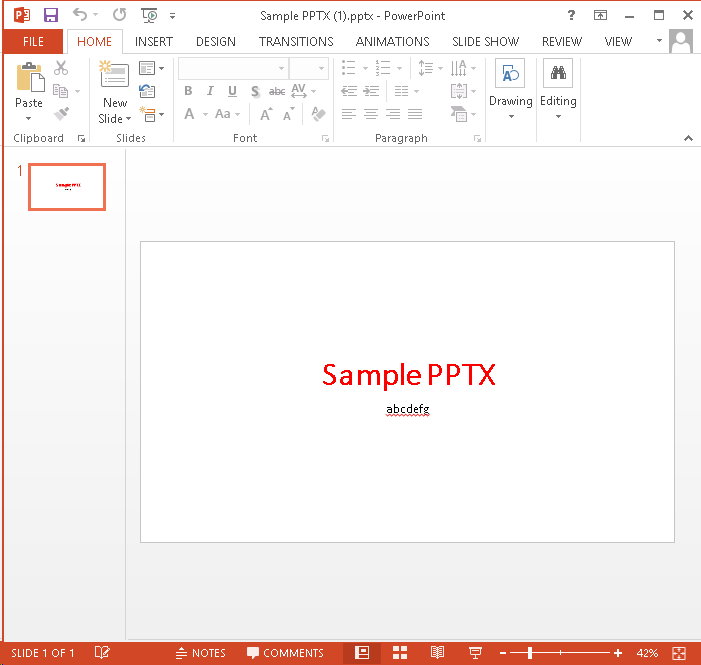
This code works!–mostly. In my environment, Excel Services was able to successfully open my basic test spreadsheet in the browser:
I could also use the Download a Copy option to save local copies and successfully open files of any type:

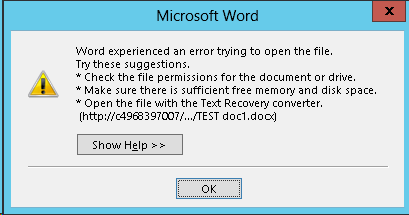
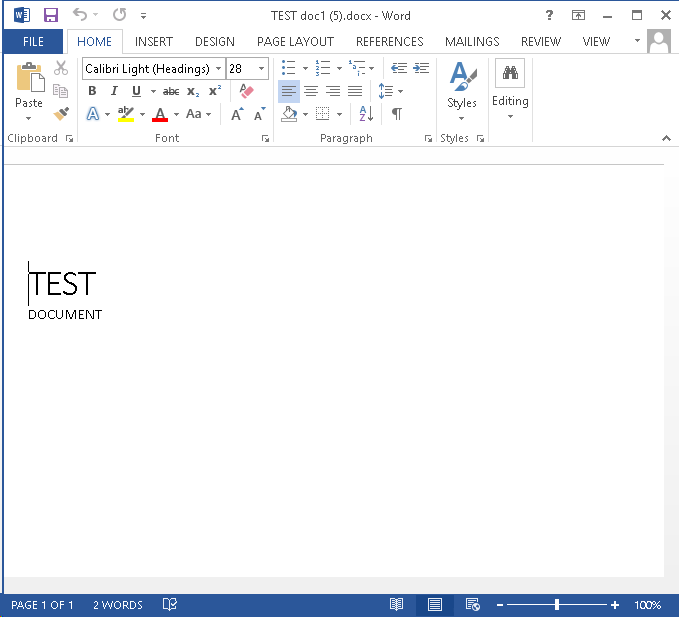
For a simple Word document, though, I was unable to click the link from the document library and have it open successfully in Word. Instead, Word reported an error when trying to open the document:
If you receive the error shown below when opening a document from SharePoint, it is due to “Protected View” in Office 2013. To disable Protected View, follow the steps outlined here.
Regardless of your Office 2013 Protected View settings, the Download a Copy option will open the document without the annoying error message.
![]()
Customize the Default #WIF ASP.NET #STS to Support Multiple #SharePoint Web Applications
Thanks to Claims-based identity in SharePoint 2010 and 2013, we have the ability to develop our own trusted login providers. These providers take the form of a Security Token Service (STS), an ASP.NET web site that packages and signs SAML tokens containing claims. SharePoint is then configured to trust this STS. In this blog post, I walk through the steps required to develop a custom STS using the Windows Identity Foundation (WIF) SDK 4.0 that supports LinkedIn as an identity provider for SharePoint. However, there is one significant shortcoming with the approach I use in that post: it can only be used for a single SharePoint web application, intranet.contoso.com. This is due to two factors:
- The realm used by the SPTrustedIdentityTokenIssuer is configured as the URL of SharePoint’s STS within that web application (e.g., intranet.contoso.com/_trust).
- The default behavior of the WIF STS web site is to forward tokens for authenticated users to the specified realm URL. From there, SharePoint’s STS will forward the logged in user back to the page he or she was trying to access.
If you tried to use this trusted identity provider on another web application (such as hr.contoso.com or finance.contoso.com), you would end up disappointed as your users would be forwarded back to the intranet.contoso.com web application no matter which site they were actually trying to access!
In this blog post, I will make some slight modifications to the out-of-the-box WIF STS web site so that:
- The same trusted identity provider may be used across multiple different web applications, each with different host header URLs.
- The SPTrustedIdentityTokenIssuer does not need to be updated and can leverage the same realm value no matter how many web applications make use of it.
- The WIF STS web site I build and customize does not need to be updated and can leverage the same realm value no matter how many web applications make use of it.
What is a realm?
The default behavior of the WIF STS web site is to forward an authenticated user back to the URL specified as the realm. According to MSDN, the realm value is “used by the STS to identify the relying party instance and to select the corresponding token issuance policy and encryption certificate.” The realm is specified as a URI (which can actually be a URL or a URN), but in many walkthroughs (mine included), we specify a value for the realm that is tied to a specific host header URL (e.g., intranet.contoso.com/_trust).
Decoupling the realm from a specific host header URL
In an environment where only one web application needs to use a trusted identity provider, it may make sense to associate the realm with the URL of that web application. But in an environment where multiple claims web applications in a SharePoint farm need to use that same trusted identity provider, a different approach must be taken. As Steve Peschka describes in this post, we can use a URN (e.g., urn:linkedin:sts) instead of a URL to work around this limitation. In the case of ADFS v2 (disclaimer: I have not worked with ADFS v2), you can define mappings between these URNs and their associated web applications as Steve describes in the blog post linked above.
Updating the default WIF STS web site
If I change my SPTrustedIdentityTokenIssuer to use the generic realm urn:linkedin:sts, but make no changes to my STS web site, what will happen? As it turns out, I will be redirected to this URN, which of course is not the URL I want my logged in users to visit. Hilarity ensues:
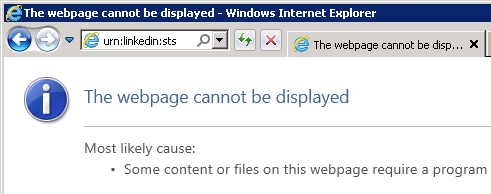
As you can see, the STS redirects the logged in user to urn:linkedin:sts, which of course produces a 404 error.
The key to having the STS redirect logged in users to the proper URL is in the CustomSecurityTokenService class, which contains a function GetScope() that sets the ReplyToAddress of the SecurityTokenService.Scope object. The default STS web site implementation uses the following code:
// Set the ReplyTo address for the WS-Federation passive protocol (wreply). This is the address to which responses will be directed.
// In this template, we have chosen to set this to the AppliesToAddress.
scope.ReplyToAddress = scope.AppliesToAddress;
The AppliesToAddress value is determined from the wtrealm parameter specified as the “OAuth Accept Redirect URL” in our LinkedIn application configuration. Remember that we had previously set this value to intranet.contoso.com/_trust (which would work as a URL), but have since updated it to urn:linkedin:sts.
How can I fix this?
The way you choose to work around this behavior depends on your requirements. If you need to use different token encrypting certificates based on the relying party (RP) application, or if you want to potentially execute any custom business logic specific to some (but not all) of your RP applications, you may choose to update the code in the GetScope() function to look more like the following:
if (scope.AppliesToAddress == "urn:linkedin:sts")
{
    scope.EncryptingCredentials = new X509EncryptingCredentials(CertificateUtil.GetCertificate(StoreName.My, StoreLocation.LocalMachine, "EncryptingCert1"));
    scope.ReplyToAddress = "http://intranet.contoso.com/_trust";
    // More things specific to the intranet web application and the urn:linkedin:sts realm...
}
else if (scope.AppliesToAddress == "urn:someother:sts")
{
    scope.EncryptingCredentials = new X509EncryptingCredentials(CertificateUtil.GetCertificate(StoreName.My, StoreLocation.LocalMachine, "EncryptingCert2"));
    scope.ReplyToAddress = "http://extranet.contoso.com/_trust";
    // More things specific to the extranet web application and the urn:someother:sts realm...
}
This approach carries the following “baggage” (which may be completely necessary based on your requirements):
- The STS has to be recompiled and redeployed anytime a new web application needs to be supported.
- It still cannot be reused across any host-header named web applications.
But what if I don’t have any special requirements? What if I just want my STS to redirect authenticated users back to whichever web application referred them, even new web applications that I don’t know about yet? We can do this! The way I chose to accomplish this is as follows:
- In Login.aspx.cs of my STS web site (which is the first page a user will hit prior to being authenticated), I can grab the host header from the UrlReferrer property of HttpContext.Current.Request and store it in a session variable with /_trust appended. This will serve as the realm value I want my STS to use and will contain the value of the referring SharePoint web application.
- In Default.aspx.cs of my STS web site, see if the session variable I created above exists. If it does, pass it in to the constructor for my CustomSecurityTokenService class.
- In App_Code/CustomSecurityTokenService.cs, store the updated realm value in a member variable. If the STS was called with a realm value of urn:linkedin:sts (some minimal validation of the RP), redirect the user to the appropriate realm URL in the GetScope() function.
Here are the relevant code snippets required to accomplish this:
Login.aspx.cs:
Uri referrer = HttpContext.Current.Request.UrlReferrer;
if (referrer != null)
{
    string defaultRealm = referrer.ToString();
    // From SharePoint, this value will be:
    defaultRealm = defaultRealm.Substring(0, defaultRealm.IndexOf("_login")).TrimEnd('/') + "/_trust/";
    Session["defaultRealm"] = defaultRealm;
}
Default.aspx.cs:
// Process signin request.
SignInRequestMessage requestMessage = (SignInRequestMessage)WSFederationMessage.CreateFromUri( Request.Url );

string defaultRealm = "";
if (Session["defaultRealm"] != null)
{
    defaultRealm = Session["defaultRealm"] as string;
}

if ( User != null && User.Identity != null && User.Identity.IsAuthenticated )
{
    SecurityTokenService sts = new CustomSecurityTokenService( CustomSecurityTokenServiceConfiguration.Current, defaultRealm );
    SignInResponseMessage responseMessage = FederatedPassiveSecurityTokenServiceOperations.ProcessSignInRequest( requestMessage, User, sts );
    FederatedPassiveSecurityTokenServiceOperations.ProcessSignInResponse( responseMessage, Response );
}
App_Code/CustomSecurityTokenService.cs:
private string defaultRealm = string.Empty;

public CustomSecurityTokenService( SecurityTokenServiceConfiguration configuration, string realm = "" )
    : base( configuration )
{
    defaultRealm = realm;
}

protected override Scope GetScope( IClaimsPrincipal principal, RequestSecurityToken request )
{
    ValidateAppliesTo( request.AppliesTo );

    Scope scope = new Scope( request.AppliesTo.Uri.OriginalString, SecurityTokenServiceConfiguration.SigningCredentials );

    string encryptingCertificateName = WebConfigurationManager.AppSettings[ "EncryptingCertificateName" ];
    if ( !string.IsNullOrEmpty( encryptingCertificateName ) )
    {
        // Important note on setting the encrypting credentials.
        // In a production deployment, you would need to select a certificate that is specific to the RP that is requesting the token.
        // You can examine the 'request' to obtain information to determine the certificate to use.
        scope.EncryptingCredentials = new X509EncryptingCredentials( CertificateUtil.GetCertificate( StoreName.My, StoreLocation.LocalMachine, encryptingCertificateName ) );
    }
    else
    {
        // If there is no encryption certificate specified, the STS will not perform encryption.
        // This will succeed for tokens that are created without keys (BearerTokens) or asymmetric keys.
        scope.TokenEncryptionRequired = false;
    }

    // Set the ReplyTo address for the WS-Federation passive protocol (wreply). This is the address to which responses will be directed.
    // In this template, we have chosen to set this to the AppliesToAddress.
    if (scope.AppliesToAddress == "urn:linkedin:sts")
    {
        scope.ReplyToAddress = defaultRealm;
    }
    else
    {
        scope.ReplyToAddress = scope.AppliesToAddress;
    }

    return scope;
}
Putting it all together
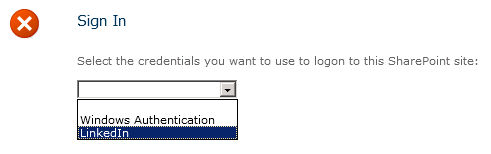
After deploying this updated STS, any new SharePoint web application I create that leverages the LinkedIn trusted identity provider will redirect users back to the appropriate URL after they are authenticated, regardless of whether the new web applications use a different host header, port, or both. To prove this, I created a new web application on port 39668 and set a “Full Read” user policy for all LinkedIn users. Upon accessing the site, I choose to sign in using my LinkedIn identity provider:
![]()
After supplying my credentials, LinkedIn will redirect me back to my STS. My STS will then determine where to redirect me based on the code above, and voila, I will be taken to my new SharePoint site, authenticated and signed in!
![]()